

Search Results
The Search Results page shows a complete set of matches.
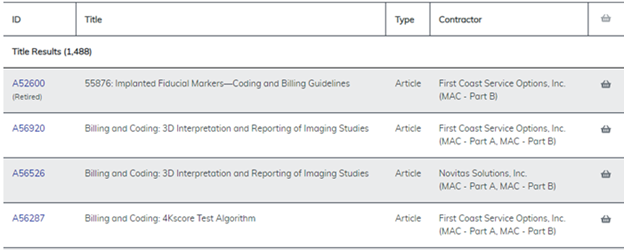
Figure 26: Search Results
Searching by document ID is the most direct way to check if the document has any new changes. You can find the document ID at the beginning of an LCD, Article, or NCD.
When using a document ID search, the search works best when you use the entire ID, but you can use an incomplete ID or code. If you search for an incomplete document ID or code, this warning message appears. Note that MEDCAC, TA, and Medicare Coverage Documents can’t be searched for by document ID.
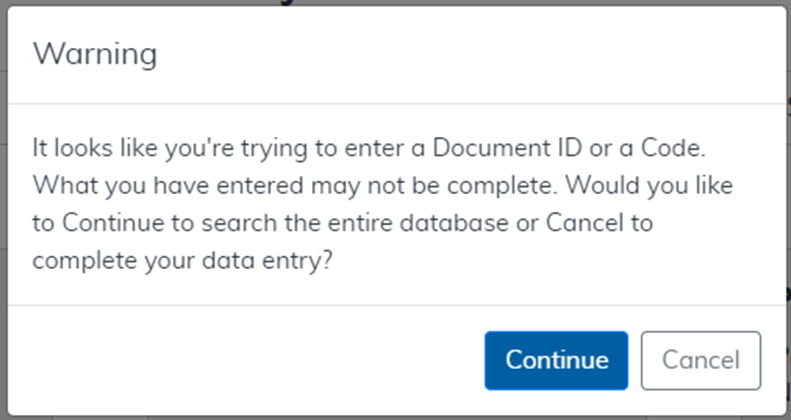
Figure 27: Incomplete Code Warning Message
If you use the full document ID in your search, the Hint List will show hints or an exact match to view. Click the result to view it.
The Hint List also shows an option to search the entire database for the document ID, and an option to view current or retired articles.
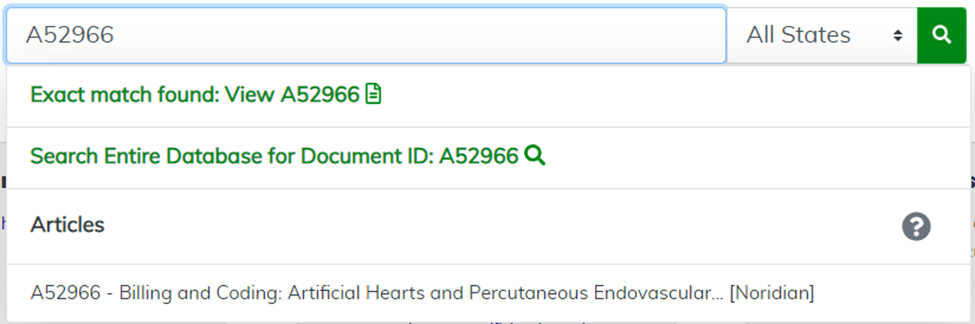
Figure 28: The Hint List as You Search by Document ID
To revise the search criteria, input new information into the Search field like a keyword or code. Click Search to leave the results page of the previous search and begin a new search. Learn more about searching by keyword or code in the Using the Search Results Filter Bar section of this product.
You can search by document ID for the following document types:
- LCDs have 6 characters, starting with the letter L: For example, L99999
- Proposed LCDs have 7 characters, starting with the letters DL: For example, DL99999
- Articles have 6 characters, starting with the letter A: For example, A99999
- NCDs are all numbers, with 2 or 3 segments separated by periods: For example: 99.9.9
- NCAs and CALs start with CAG-, then 6 or 7 characters: For example, CAG-00190R2
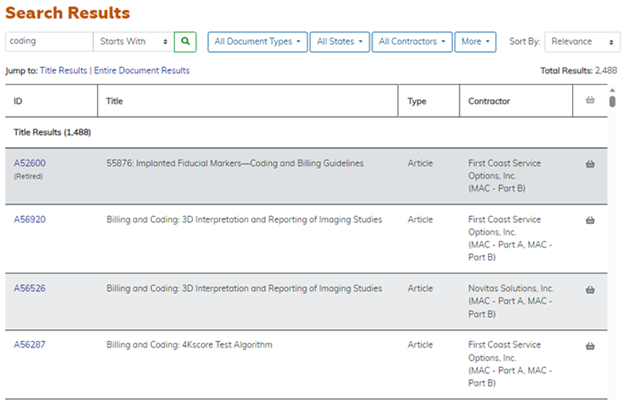
Figure 29: Search Results
The figure above shows part of the search results.
Access the list of results by scrolling down to view each document.
- Click on the document ID to view a NCD or LCD of interest. If a document has CPT or Current Dental Terminology (CDT) codes, you must accept the American Medical Association (AMA), American Dental Association (ADA), and National Uniform Billing Committee (NUBC) User Agreements before you can view the document. The AMA/ADA/NUBC User Agreement displays once per web session, the first time you view a document that may contain CPT or CDT codes. You must accept the agreement to view documents with CPT or CDT codes.
- To add a document to your Basket, select the Basket icon in the right column next to the document. Then, click the Basket option in the navigation bar to view the items in your Basket.
The video below shows how to use the Basket icon to add items to your Basket.
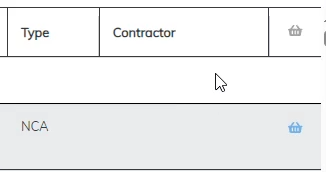
Figure 30: Adding to the Basket
The video below shows how the Basket option holds documents until you would like to read or print them. Click the Basket icon to see the items in your Basket.
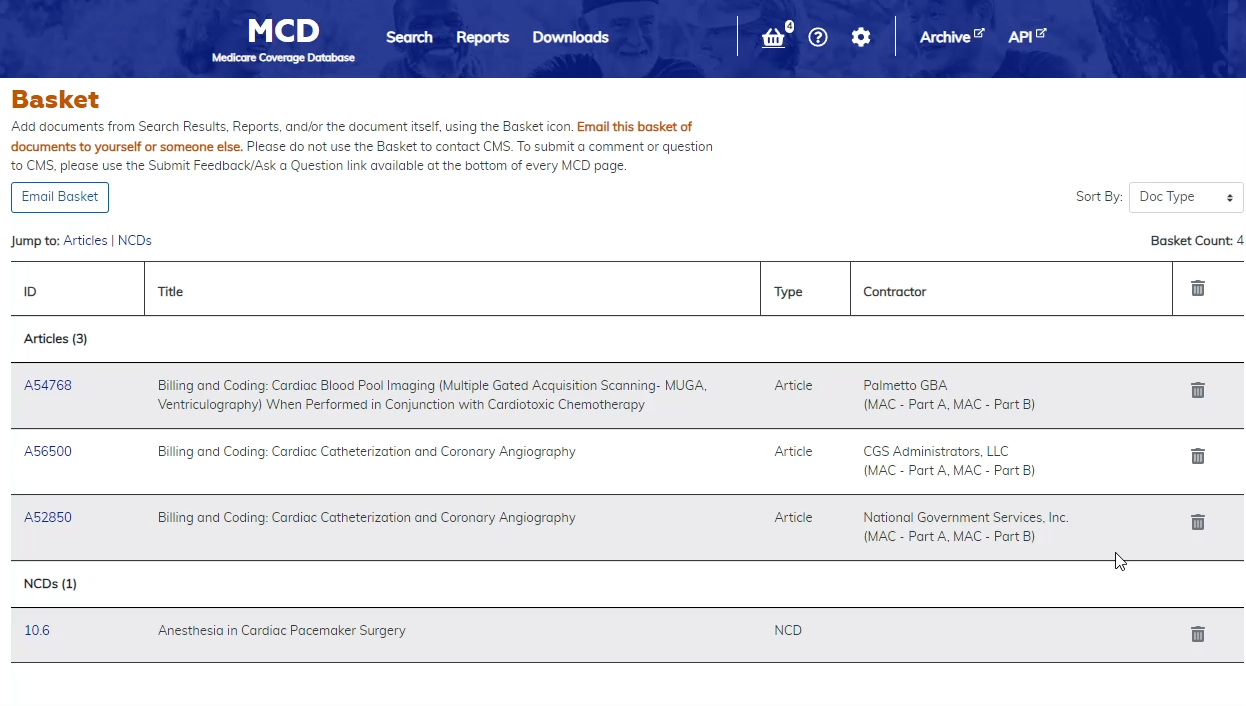
Figure 31: Finding the Basket in Use
Using the Search Results Filter Bar
Filter search results by accessing the filter buttons on the Filter Bar. Specifically filter through the results by selecting from the dropdown filter buttons, including Starts With, All Document Types, All States, All Contractors, and More.
The video below shows several ways to use the Filter Bar in the Search Results screen.
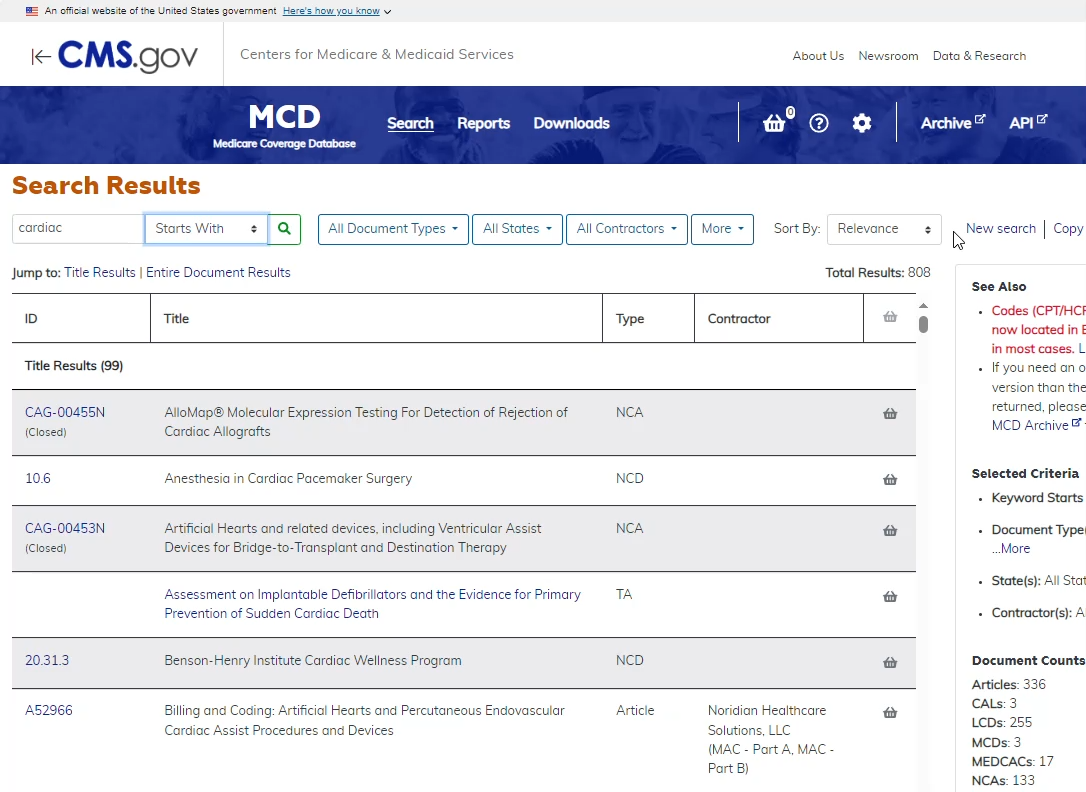
Figure 32: The Filter Bar Includes the Filter Buttons
The viewing options in the Filter Bar offer a variety of ways to narrow the documents included in your search results, beyond searching by the document ID, code, or keyword. You can filter documents by their document type, by state, by contractor, or by 6 specific options listed under the More filter button.
The video below shows the Document Type filter in the Filter Bar of the Search Results page.
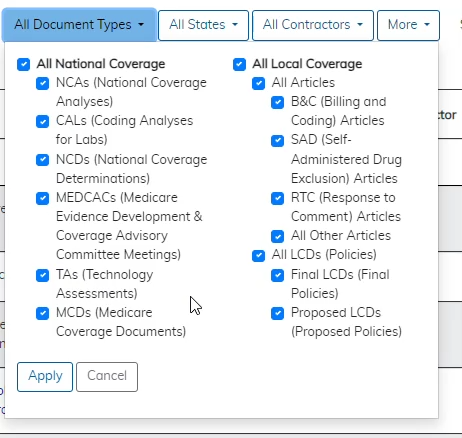
Figure 33: Using the Document Type Filter in the Filter Bar
Start by selecting All Document Types to view the available options. You can select or deselect any listed option. Make sure to click Apply each time you change your selections.
The default setting is All Document Types, which includes all National Coverage and Local Coverage document types. As you change the filter and click Apply, the filter button label adapts to show your selection.
The video below shows how to deselect All Local Coverage to search for only National Coverage documents.
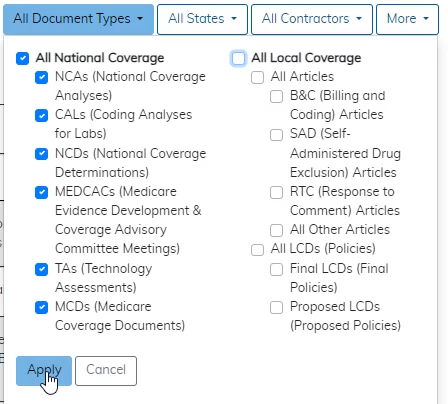
Figure 34: Selected only National Coverage documents
Deselecting the All Local Coverage column of options allows only the National Coverage Documents to appear, with the label All National Coverage then printed on the filter button. Again, the results are updated each time you change your selections and click Apply.
Selecting only NCDs, or any other singular category, under the All National Coverage option changes the label on the filter button to match your selection.
The video below shows the filter option being used to select only NCDs.
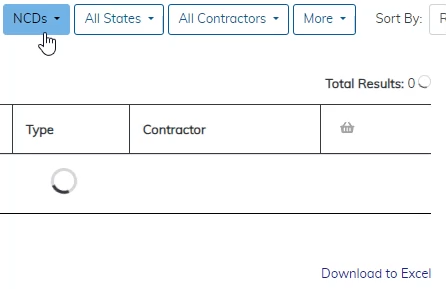
Figure 35: Selecting only NCDs in the All Document Types Filter
For example, if you only selected NCDs from the All National Coverage section, only those documents would appear, and the label of the filter button would change to read NCDs.
The dropdown list for the All States filter button offers a way to search each U.S. state and territory, including CMS Region 1 – CMS Region 10.
The video below shows the filter selection for All States.

Figure 36: Using the All States Filter Button
You can search for a range of multiple states or regions by holding the Shift key as you select options.
The video below shows the filter option to select several specific states in a range.
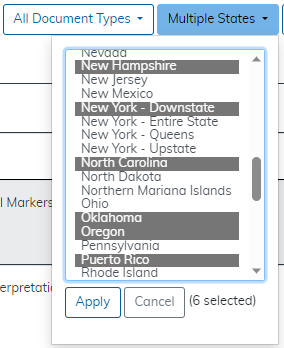
Figure 37: Using the Shift Key to Select a Range of Choices
The video below shows the filter options to select states or territories that aren’t part of an alphabetical range.
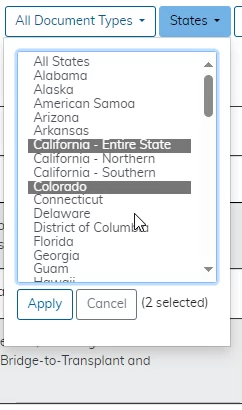
Figure 38: Selecting Several Choices Using the Ctrl Key
If you want to select specific states, territories, or regions at once, hold the Ctrl key as you select them. Like the other filter buttons, the label updates to match your selection. If you select more than 1 choice, Multiple States appears, but if you select 1 choice, that state, territory, or region name appears in the label. References to CMS Regions now appear with Arabic numerals instead of Roman numerals.
The video below shows how the label of the filter button adapts to your selection.
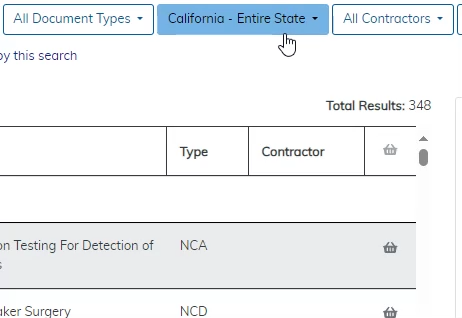
Figure 39: Selecting 1 Choice Changes the Label Name
Helpful Hint
To select multiple options from a criteria list, hold down the Ctrl key and select options with the mouse or hold down the Shift key and select criteria with the down arrow on the keyboard. When you enter multiple criteria, only records meeting any of the criteria appear.You can also filter your results by contractor by using the All Contractors filter button. The default setting returns all Local Coverage and National Coverage documents.
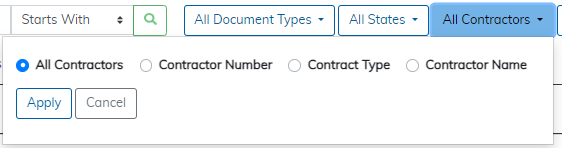
Figure 40: Using the All Contractors Filter Button
You can narrow your results by selecting specific contractors, and as you make those selections, new lists appear nearby. Filter your results by contractor number, contact type, or contractor name.
The video below shows the All Contractors filter when selecting options by Contractor Number.
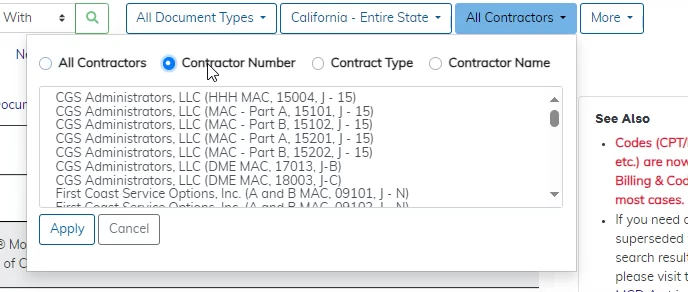
Figure 41: Using the Contractor Number Option Under the All Contractors
The video below shows selecting Contract Type and how it changes the filter label and your search results.
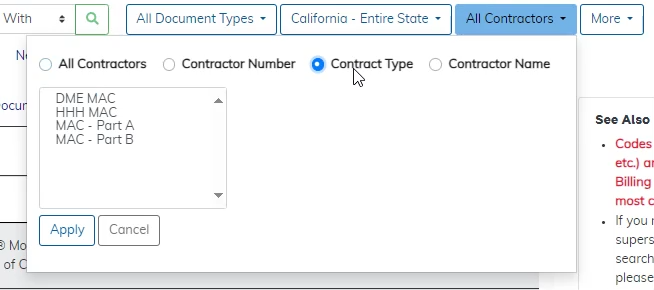
Figure 42: Using the Contract Type Option Under the Contractors Filter with MAC – Part A Applied
Like the other filter buttons, the label changes names to match your selections.
The last filter button is More, which covers 6 categories: NCA/CAL Status (NCAs and CALs only); Benefit Category (NCAs, CALs, and NCDs only); CPT/HCPCS (Local Coverage only); ICD-10-CM (Local Coverage only); Date Criteria; and Article/LCD Status (Articles and LCDs only).
The video below shows the options available using the More button.
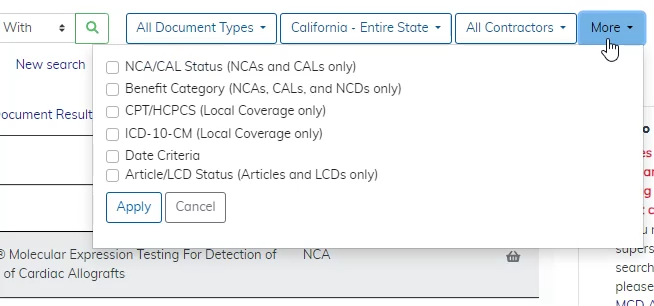
Figure 43: Selecting the More Filter Button
You can filter results for NCAs and CALs only by choosing between Open, Closed, or Open for Public Comment. Since NCA/CAL Status applies only to NCAs and CALS, the results will exclude all other document types.
The video below shows how the results change when filtering for NCA/CAL Status.
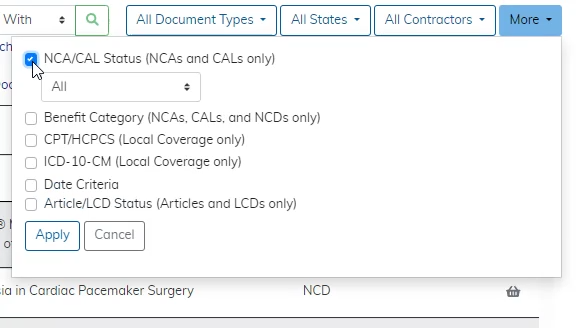
Figure 44: Selecting NCA/CAL Status Using the More Filter Button
You can also view results by their Benefit Category, including NCAs, CALs, and NCDs only. Since the Benefit Category applies only to NCAs, CALS, and NCDs, the results will exclude all other document types.
The video below shows the Benefit Category option under the More button.
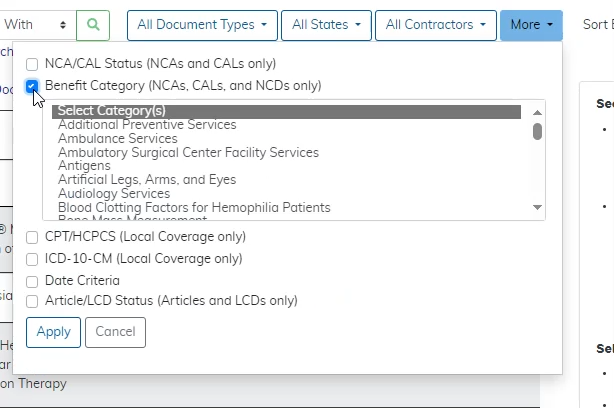
Figure 45: Selecting Benefit Category Using the More Filter Button
Filter Local Coverage results by using the CPT/HCPCS or ICD-10-CM code entry fields. Neither filter option returns National Coverage documents since those documents don’t include CPT/HCPCS codes or ICD-10-CM codes.
The video below shows how to use Code filters under the More button.

Figure 46: Selecting Code Filters Using the More Filter Button
Enter the code in the appropriate Enter Code field. For ICD-10-CM codes, select Code Lookup to find the correct code.
The video below shows how to use the ICD-10-CM codes feature to narrow your results.
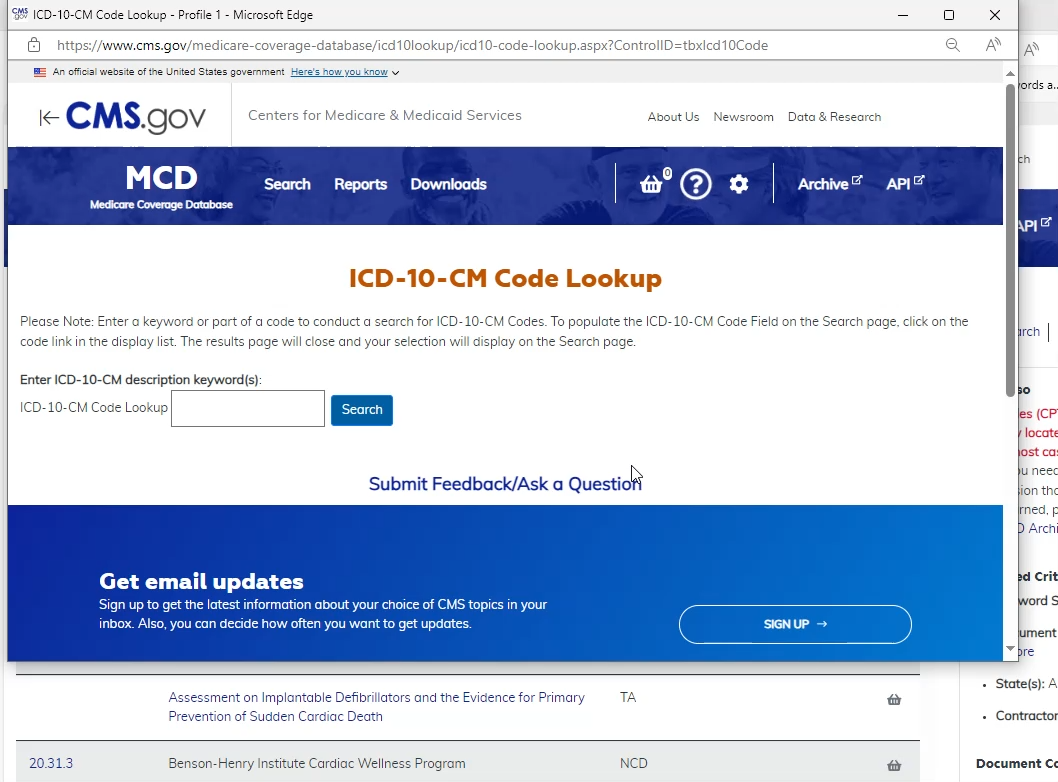
Figure 47: Finding the Code Lookup for ICD-10-CM Codes
Filter for the most recent version of articles and LCDs by selecting Latest Update. The Search Results show articles and LCDs currently in effect, future effective, or retired. Since National Coverage documents don’t have versions, the Date Criteria filter doesn’t affect those results. You can also narrow your results by choosing only documents Currently in Effect or input a range of dates to apply to the results.
The video below shows how to use Date Criteria to narrow the results.
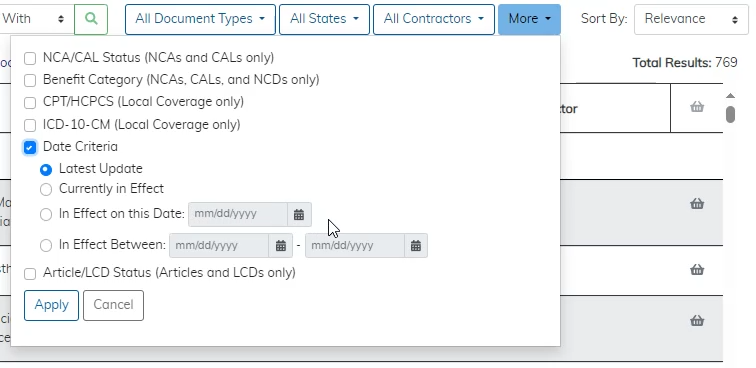
Figure 48: Using the Date Criteria Range in the More Filter Button
You can also sort the results in 5 ways, including Relevance, Title, Doc Type, Contractor, and Last Updated.
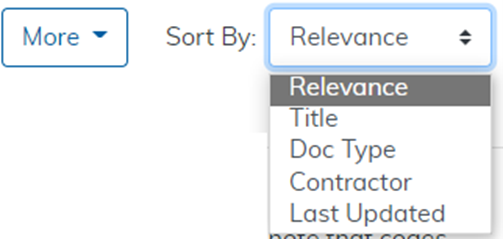
Figure 49: Five Sort By Options
If you sort by Relevance, results appear in 2 sections. You can Jump To either Title Results or Entire Document Results.
The video below shows different options for viewing search results. In this example, there are options for Title Results or Entire Document Results.
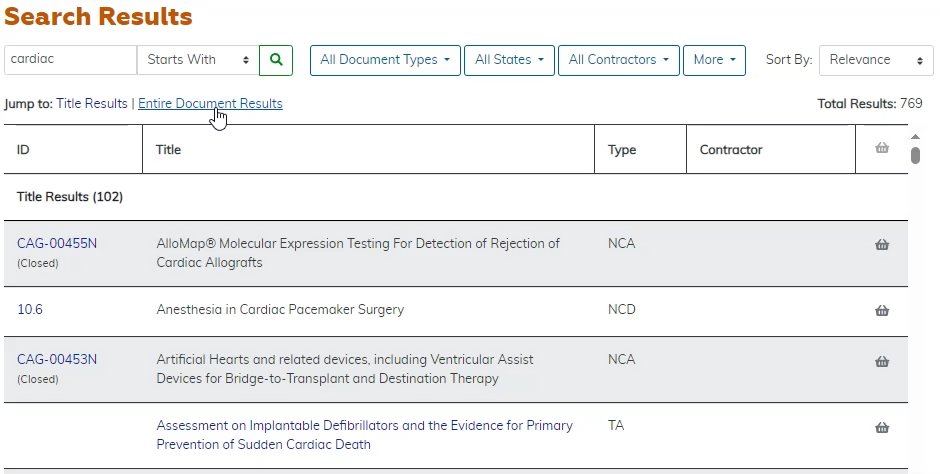
Figure 50: Sorting By Relevance
Results that show the keyword in the title appear first, and results with the keyword in the body of the document appear second. For each list, the results appear alphabetically by title. As you change the Sort By option, the Jump To links change. Sorting by title lists each document alphabetically by its title. Sorting by document type lists articles, CALs, LCDs, and others alphabetically by title in each subcategory. Sorting by Contractor breaks up the documents into a National Coverage section and a Local Coverage Section.
The video below shows how to sort results by clicking Last Updated to show the results with most recent changes.

Figure 51: Sorting Results by Last Updated
Using the Last Updated sort lists results in descending order by their most recent edit date. Results show the Last Updated date under the title for each document.
Keyword Searches
You can search by Keyword on the MCD Search page for National and Local Coverage documents that contain a specific word or words. Like we covered in the Using the Search Results Filter Bar section, you can filter any results by keywords that appear in the title or body of documents in your search results.